|
Major Electrical Systems and Solar Upgrade
|
Electrical Upgrade: When we first bought our RV it only had on group 27 coach battery
that was mounted under the hood. After a year or two the battery was shot so I wanted
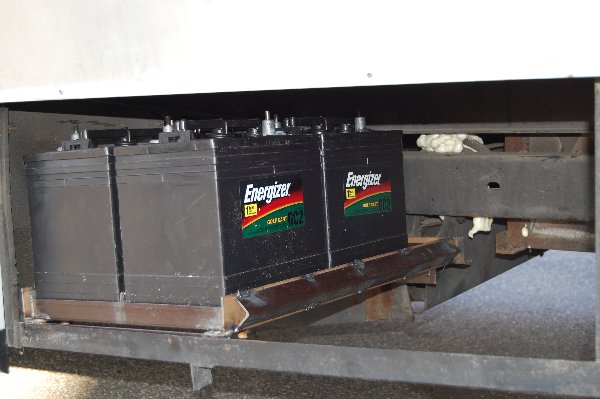
to upgrade to two 6v GC2 batteries. I had to weld together a frame to hold them seen here
I also wanted a battery monitoring system better then the four little lights provided.
so I build this monitor
panel.
After a year or two, happy with the new batteries and the monitor, but being the serious
tinkerer I am, I wanted to upgrade to 4 6v GC2 batteries, add a better inverter, and add solar panels.
I read and researched a lot, I finally decided to go with the following equipment:
4 - 6v GC2 Batteries (Golf Cart)
3 - Keyocera 130TM solar panels
1 - Blue Sky 3024i Charge Controller
1 - IPN Pro remote with 500a Shunt & Temperature sensor
1 - Xantrex Prosine 1000w Pure Sine wave inverter
The first step in this upgrade was to find a place to put the batteries. I knew they needed
to be vented so I wanted an outside compartment but I didn't want to give up any compartment
space. I also didn't want to give up the genny. I know batteries must be checked regularly
so I wanted to be able to check the batteries before every trip so I wanted to have easy access.
I looked at the spare tire compartment. The batteries would fit in the compartment width and depth
fine but height was real close going in and out.
I knew I didn't want to have to disconnect the batteries each time to check them so I welded up
a battery tray that would allow me to slide them out.
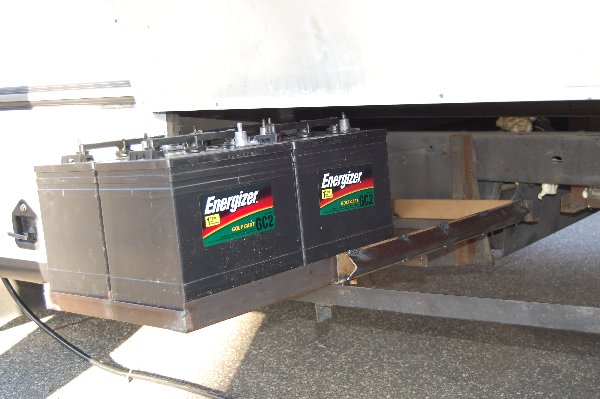
Ok so the batteries are taken care of, I also gained a small storage bin to the right of the batteries
about 17" wide x 24" deep. That will come in handy I am sure.
Now what to do with all these remote display units? I didn't want them scattered all over the coach and
I didn't want to cut a hole in the wall so I decided to make a picture frame with all the displays
mounted in it.
Now I am good with metal, welding, cutting and grinding but I am not so good with wood. So I brought in
the experts (My neighbor) you may remember he helped me (pushed me aside and fixed it) when I broke
the manifold bolt in the head when doing the Thorley Headers.
He is an excellent craftsman with everything he does so I am glad he helped.
He and I built a nice little picture frame for all the electronic equipment. This box is made with oak sides
and doesn't use any nails to hold it together, it is glued with tight joints the face is floating in a rabbit
joint and the back is recessed in with a key way to hang it on a screw. ( I hope I didn't butcher those terms )
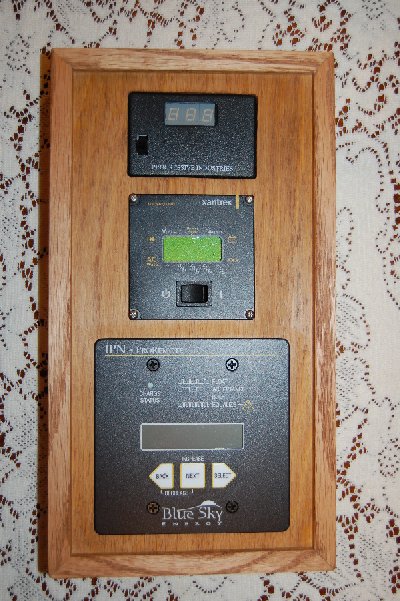
And this is what it looks like wired and mounted.
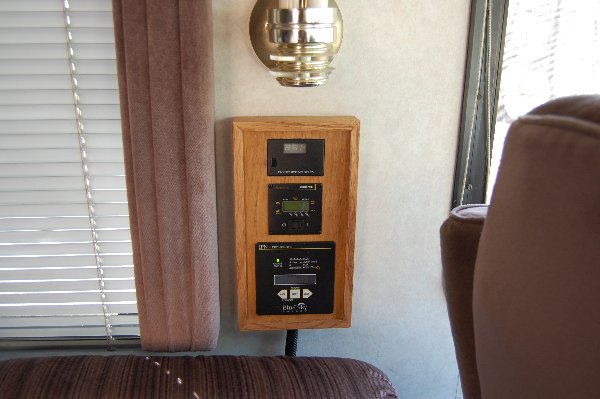
From top to bottom The monitor displays are:
Progressive Dynamics HW30C Electrical Management System
Xantrex Prosine 1000w Inverter
Blue Sky IPN Pro Remote
Ok so now the fun part, How to wire up all these changes? Because the coach batteries were
in the front of the coach the remote disconnect switch was in the front as well. Well I didn't want
to run 00 gauge wire forward and back again, so I decided I would move the disconnect switch.
The first problem is that the coach manufacture wired half the electrical system to the front using breakers
and half to the back using a small fuse panel. The second problem is there are two ISOlator relays both which
latch when the ignition is on to charge the coach batteries from the alternator and one is used for the Emergency
Start Switch. These isolators are wired to both halves of the disconnect switch.
I decided I had better think this trough so using the schematic provided by Goergie Boy and after calling
Goergie Boy Manufacturing for help with there schematic (they were great especially because this coach is a 92')
I drew a new schematic showing the entire system:
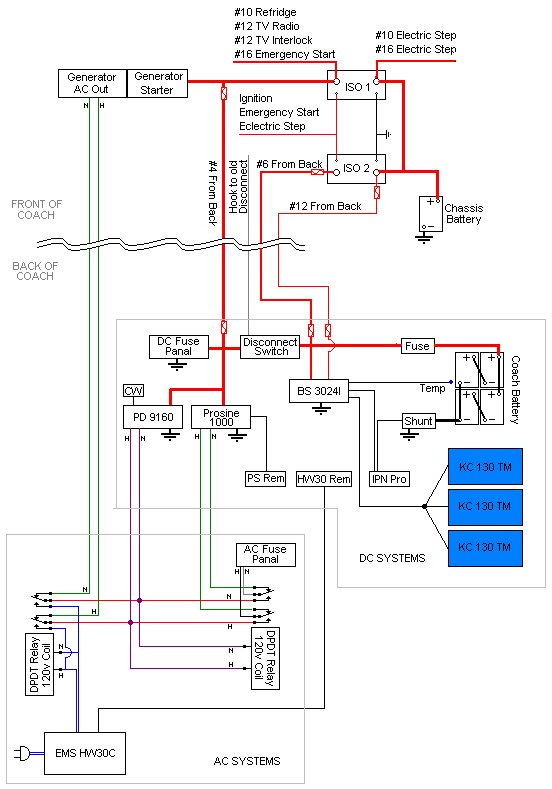
I already had the #6 and #4 running front to back. The #12 and the new disconnect wires (16-4) I had to run.
The Blue Sky Charge controller has a 2amp secondary charging circuit to trickle charge the chassis battery.
Thats what the #12 is for.
Alright. Here we go. I ran all the wires needed to the electrical compartment, The Display panel
(3 - 22-6, 1 - 22-8 twisted & shielded), Solar Panels (3 - 10-2), Batteries (2 - 2ga), Disconnect switch (16-4)
and a single #12.
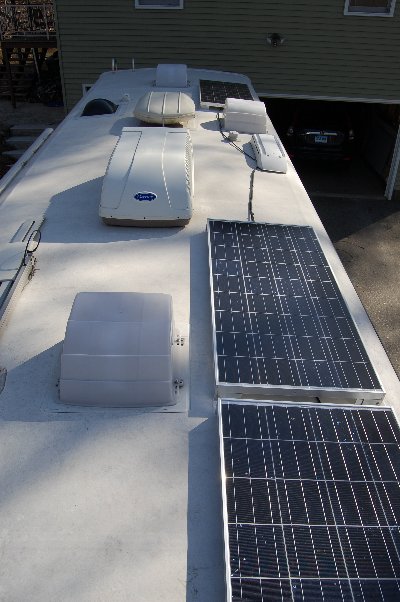
I then mounted the Solar Panels using brackets I made. These bracket give you the ability to tilt the panels
all the way up for cleaning and service and I built tilt rods to angle the panels towards the sun during
extended stays or during the winter months.
Looking back to front

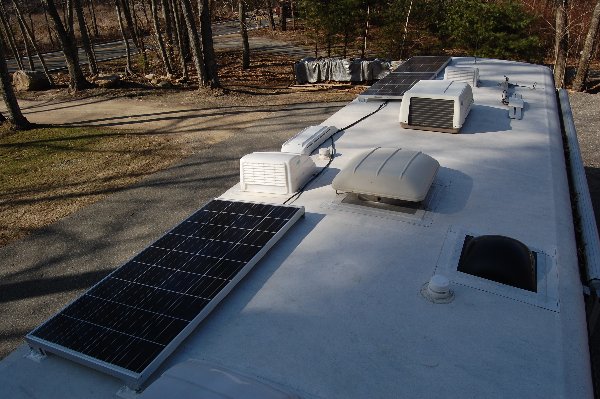
Looking Front to back
From a little more distance back to front
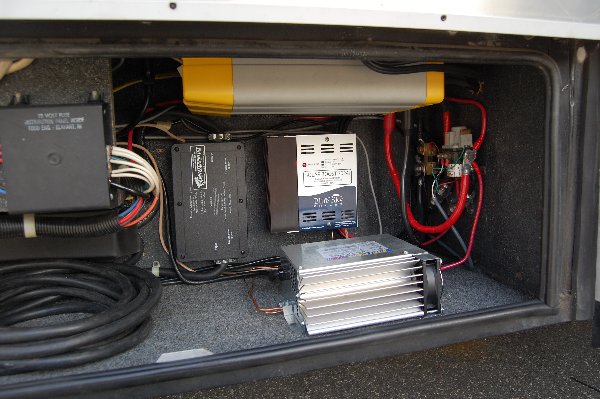
With all the equipment in place, I started wiring it all together. It took several hours to get it all done.
Almost all the terminal ring connectors were soldered to the wire then heat shrinked. Only a few (two or four that I can think of
are crimped). I took my time and made sure I followed the schematic.
Electrical Compartment with Equipment Installed
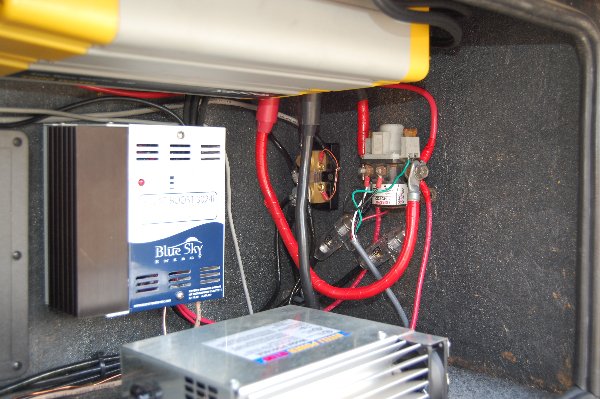
Details of the 500amp Shunt and Disconnect Switch
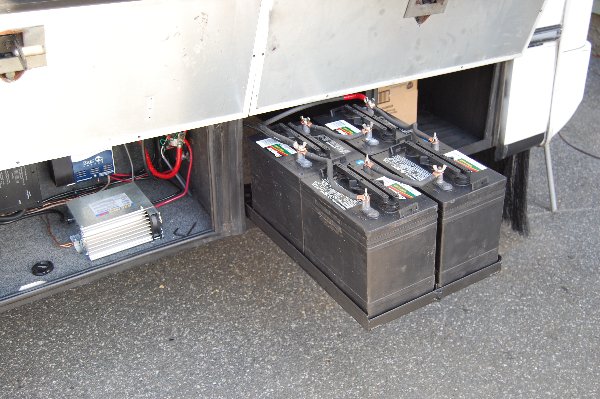
The new slide out Battery tray painted with the batteries all wired up and you can see the new compartment, already has stuff in it, that didn't take long.
So far everything is working great. I haven't given the new batteries a real workout but the solar panels
have them charged and into float before 9am (sun has barely gotten over the trees here). It is really neat
to see more amps going to the battery then coming from the solar panel. MPPT is really cool.
I also really like the 2nd 2amp charging system for the chassis battery! (this prioritizes the coach
batteries but once those are full it sends up to 2amps to the chassis battery) That should keep the starting
battery toped off too.
One other note about the expense of the IPN Pro Remote. This remote gives so much control and so much feedback
about the current condition of the battery. Coupled with the 500amp Shunt and Temperature probe, it is a very
intelligent charger and battery monitoring system, giving you much the same if not more information then a
TriMetric 2020, I would highly recommend it!
Conclusion, This is an expensive project ($3,283) but one that should have long term rewards! I believe with our
conservative electrical usage we should easily be able to boondock as much as we want with very very little
genny usage.
|
|
|